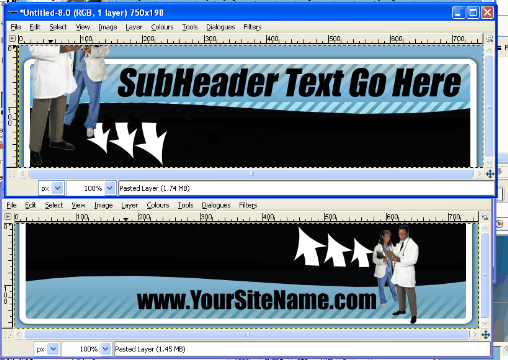
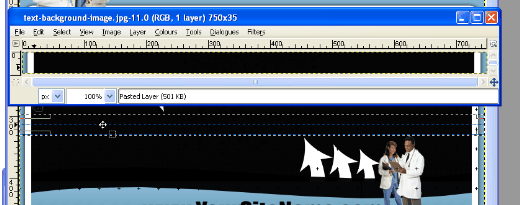
Objective – To customize a website template created in photo shop, including changing text and adding a background, as well as cutting and exporting the final image for html output.
Notes – This guide assumes you already have a template ready, and the graphics source files are of .PSD file format.
One slightly unfortunate point to note is that although GIMP can handle .psd files virtually the same way as photo shop, it cannot render layer effects or editable text layers out of a psd file.
This is OK as we can add our own effects and text layers using gimp as well
Don’t worry too much if the program looks slightly confusing, we’ll learn how to use everything we need to customize a template in this guide.
-
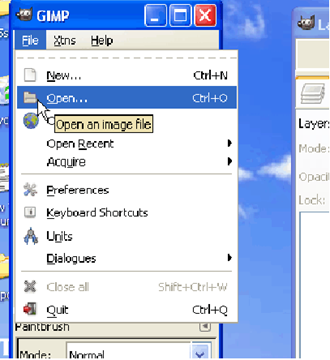
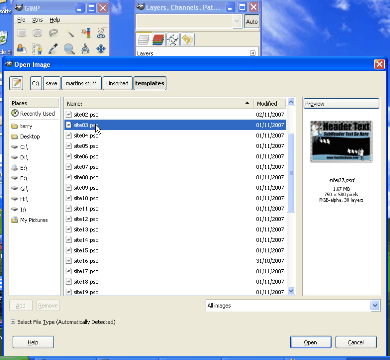
STEP 1: Open the GIMP program and locate your file to edit.
**Remember to pick your PSD source image file**
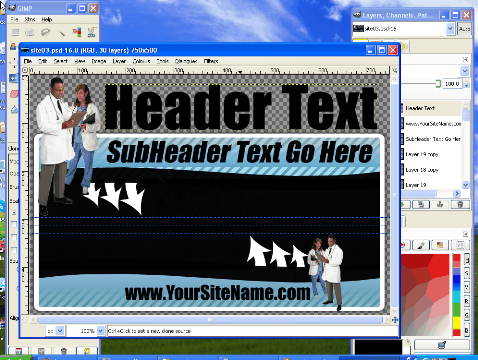
Now that you’ve opened you’re file, you should be presented with three independent GIMP windows on your desktop –
TIP!
When your using GIMP, you can maximize or minimize each window as needed. This way you can select the tool you need, and maximize your image only, so as to prevent distraction or obstruction from the tool and layers windows while editing.
-
STEP 2: Familiarize yourself with the images layers.
Before we begin any editing, we need to decide which layers need changing, so that we only adjust those layers and not any other part of our template.
-
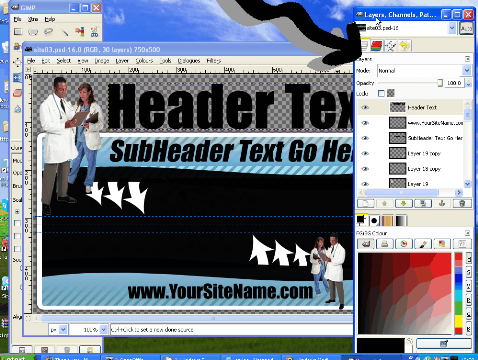
Bring the layers window to the front, so it’s active
TIP! If you’ve already maximized your image or any other GIMP window and are wondering where the layers window or any other GIMP window is, just take a look at your windows tool bar and you’ll see them there –
-
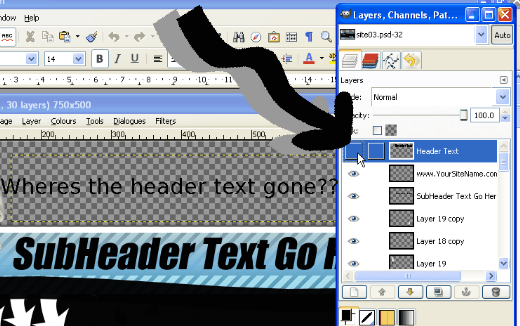
Turn each layer on and off individually, so you can decide which layers you are going to edit or delete, and which ones you are going to leave alone. In the layers window you will see all of your layers, each will be named. Some will be self-explanatory, like the text layers, and others may be called things like “layer 1” etc so we need to find out which is which.
We do this by clicking our mouse cursor on the eye symbol on the left of each individual layer. No eye means the layer is hidden, as the image displays below.
-
STEP 3: Add your Custom Text
Now that you’ve figured out which layers are which, one by one you are going to have to remove the text layers and replace them with new text layers that you’ll create now.
-
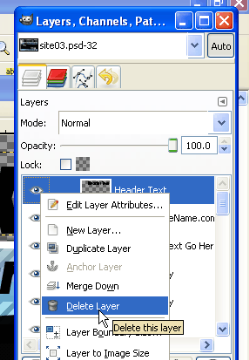
Select the first layer of text to replace in our layers window then right-click the blue highlighted box and choose “delete layer.” Now, in the main image the text we wanted to edit will no longer be there (in the example, the header text has been removed).
-
Create a New Layer
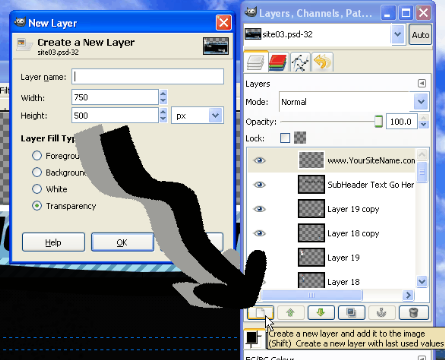
By pressing the correct icon in the Layers window, we can create a brand new Blank Layer to add our custom header text to. Leave the Layer Fill type settings to Transparency.
-
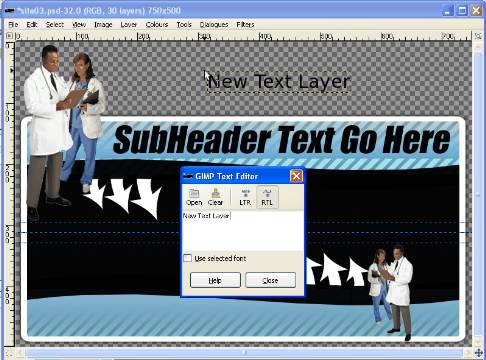
Write Text
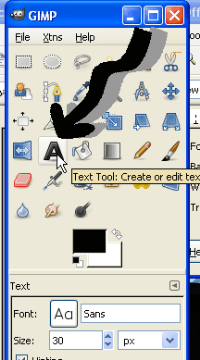
Select the Text tool from the File and Tools window
You’ll see that there are options in the bottom half of the window, allowing you to adjust the font and size, alignment and color. These can be adjusted before or after writing the text for the new layer.
Next, making sure to check that the New Layer we just created is still selected (do this by looking at the layers window, and seeing if your “new layer” box is highlighted blue) we move the cursor over the main image to the point where we want to add our new text. Click the mouse once the cursor is in position and a box will appear ready for you to input your text.
Once we’ve placed the text in the image, we can go back to the Tools window, and making sure our Text tool is still selected, we can adjust the font and size accordingly.
-
Position text
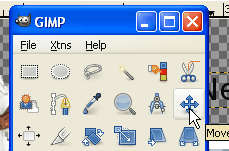
Once the correct font and size have been selected, and the text has been written, it’s time to position the new text layer perfectly in place, ready for the finished product soon. We need to select the Move tool, that’s shaped like a cross made up of four arrows.
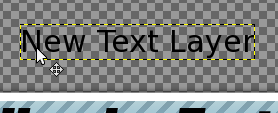
Once the correct tool is selected, double check that we still have the correct layer highlighted (check the layers window for the blue highlighted layer) and then we can move our cursor over to the text, and place it anywhere. It can sometimes be tricky, as if you don’t place the cursor precisely over a piece of the text we wish to move, it won’t do anything. Make sure your cursor looks like this
And you can then move it anywhere.
-
STEP 4: Changing the background Color
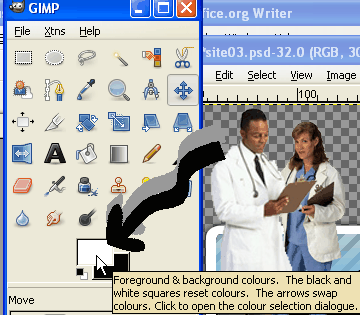
The easiest way to do this is to make a new layer for the background, and have it created in the color we wish the background to be. First we select the color to use –
If you click your cursor onto the pair of boxes in the tools window, you can select both the Foreground and Background color. It doesn’t matter which is which as you can rotate between background and foreground color anyway, so make one of them the preferred background color you wish to use.
Then in order to get this as our background color, we need to find the original Background layer in our Layers window. This will be right at the bottom of the list of layers. Once we’ve found it, make sure it’s visible (the eye icon is on and not off). If it’s not the background color we wish to use then we need to make a New Layer, and delete this original background layer. Remember earlier when we created a new layer, and kept the “Layer Fill Type” to transparency, well this time we want to change it, and make sure the option for Foreground color or Background color is selected instead (whichever one we made the right color in the last step). Voila, now we’ve got our background the color we wanted.
-
STEP 5: Flatten image ready for cutting.
Double check our image. Have we finished changing all the text? Have we moved anything that needs moving?
Good.
Now we’re ready to flatten our image and export it to a web friendly format.
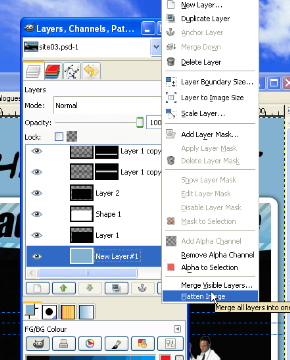
To Flatten, we need to go to the Layers window, and right click on any layer, selecting the “flatten image” option at the bottom of the right click menu.
STEP 6: Cutting our final image into smaller sections for a web page
The template we have used here is a simple one, but for even complicated designs with lots of sections the same principle applies. We need to get the image from one big picture into smaller segments for our web pages. With this template, we want a Header or Top section, a middle section for a content background, and a footer or bottom section. For the middle we will take a cut that is uniform, so as it will become a repeated background on our web page.
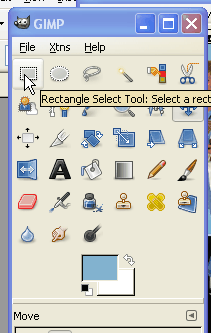
To do this we need our Rectangle Select tool and Grid lines on our image window to guide us
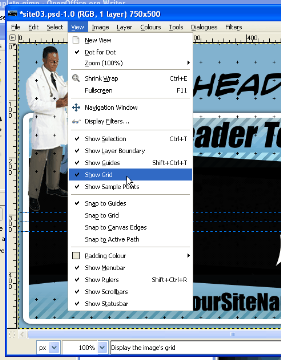
Default setting is grid lines OFF, so simply click the “view” tab and click your cursor onto the Show Grid option. If you go back to the “View” tab you should now see it ticked like here.
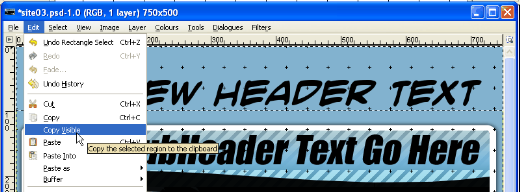
Once your grid is up, using your cursor set on selection tool make a full width selection of the main head section. Once you’ve made a selection, go to the “Edit” tab and select “copy visible”.
As you can see, I decided to do this header in 2 sections, with this first selection going down to the 100 pixels point on the vertical margin.
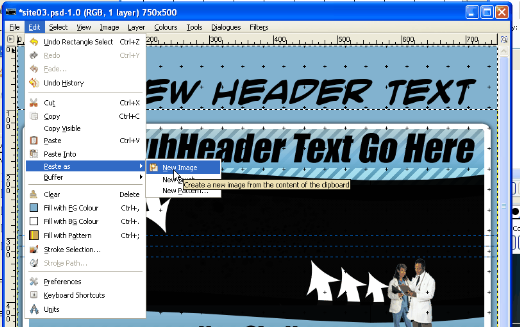
Once you’ve copied your selected section you then need to open the “Edit” tab again and select “paste into” then “new image”
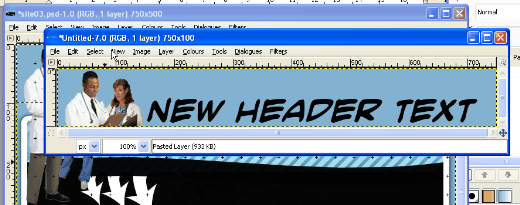
If you’ve done this part correctly you should end up with another window opened up with another image, just like the one below. This is the first section of your new website/header, and should be named something accordingly, such as header_1.jpg.
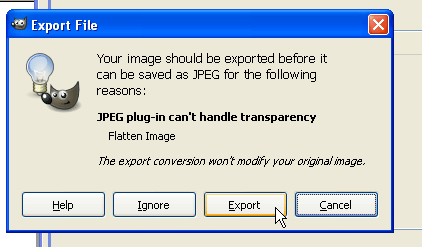
When saving your template file, make sure to add the filename extension, like .jpg or .gif or whatever you prefer your images as. Don’t be alarmed if a box appears asking to flatten your image, this is fine, simply press export.
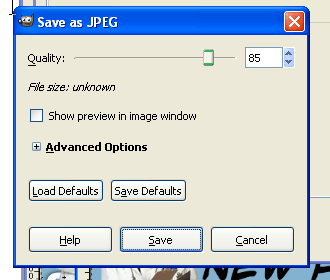
Lastly depending on what kind of file your saving (jpg or gif or png) you’ll be asked for quality/color levels etc. Just remember that the lower you set these, the less quality your Images will come out. Best to just click save and don’t change anything here to start with until you know what you’re doing.
Do the same for the other section of header if you have any, and for the footer, like this
Finally, once you’ve got those pieces saved into individual images, you want to do exactly the same for the middle section, only it will be smaller, and it has to be a perfect slice so that it will repeat evenly as a background image
Voila!
Now you just need to put it all together with your favorite HTML Editor.
Bonus Tips :
-
If you ever happen to make an error, don’t worry, you can step back as many steps as you need to by pressing “ctrl+z” on your keyboard.
-
If your Selections are slightly too big, you can make minor adjustments by placing your cursor to the edge of your selection, and holding the “ctrl” button while pressing the directional arrow you need
-
If you didn’t already know, to add more fonts you need to place the font files inside your windows Fonts Folder, usually located around the “C:\WINDOWS\Fonts” area of your hard drive. You can download many free fonts from places like 1001fonts.com
-
If you start feeling brave, then play with some other tools. The Rotate, Scale and Shear tools can get some tricks going on your text, and that’s just for starters.

