Objective: To save time when formatting long documents by using Word’s built-in styles and outline view.
Definitions:
– Styles are paragraph and character formatting commands that are assigned a specific name. Word has many default styles that you can use to make word processing a little easier. Using styles will save you time, allow you to make global changes quickly, ensure you have consistent formatting in your documents.
-
Outline View is used to get an overview of your documents style. It is one of several views you can use in Word.
Using Styles
-
STEP 1 Locating Styles
Word contains several default styles which are available each time you begin a new document. As you add new elements (Headers, Footers, Font Changes, Footnotes) to the document their style names will also appear in the Style Menu.
-
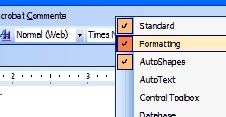
You’ll first need to add the Formatting toolbar to your top toolbars. To do this, right-click your toolbar at the top and put a check next to Formatting
This should add these or similar options to your toolbar.
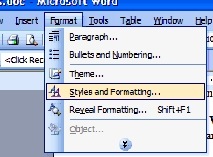
Alternately, you can locate the Styles by navigating to Format -> Styles and Formatting which will bring up a task pane on the right showing the styles options.
-
STEP 2 Apply Styles
For this example, we are using the Formatting Toolbar.
-
Select the Word/Paragraph(s) you wish to format by highlighting the desired text.
-
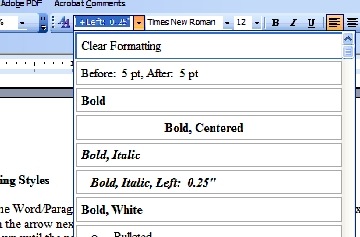
Click on the arrow next to the Style menu to expand it (see below)
-
Select the style you want to apply to the highlighted text
-
STEP 3 Apply Changes to Multiple Text Areas
If you want to apply the same style to multiple items, you can do this at one time. For instance, say you wrote an ebook and all the chapter titles were bold but you now want them to be italicized as well.
-
Select the first chapter title
-
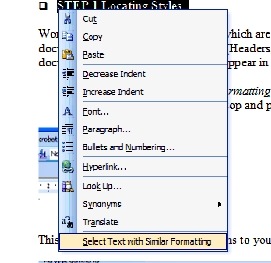
Right-click the newly changed title & click Select Text with Similar Formatting
This will select all text with the same type of formatting. Simply choose your new formatting options from the drop down menu as shown in step two.
-
STEP 4 Create a New Style
If you want to create a new style of your own, you will need to use the right Task Pane explained in Step 1.
-
Select Style & Formatting from the Format menu.
-
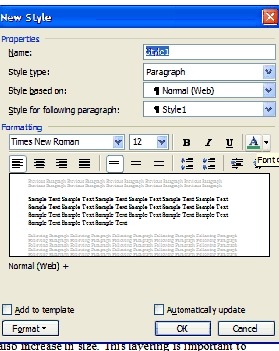
Click on the New Style button
-
Name your style something you will remember
-
Select the type of style you want to create (paragraph, character, table or list)
-
Select the Based-on style (select “No Style” unless you have a good understanding of what this option will do)
-
Set the ‘next paragraph’ style. (the style of the paragraph you create when you press return key at the end of a paragraph). This is typically used for single paragraphs like quotations, headings, sub headings, etc. Leave as default if you aren’t sure.
-
To ensure any changes to this style later on are added to all text written in this style, tick the Automatically update box.
For example, if you create a style and later decide you’d like it to be bold or left aligned, when you modify one paragraph in the document it will automatically apply it to all paragraphs in that style.
-
If you think you will reuse this style for other documents, tick the Add to Template box.
-
When you’ve finished, click OK.
-
STEP 5 Modifying an Existing Style
If you want to modify the formatting of an existing style:
-
Navigate to Format -> Styles and Formatting.
-
Right-click the style you want to modify
-
Select Modify Style. Repeat steps 3-8 in Step 4.
Follow these same steps to delete a style
-
STEP 6 Copying Styles from Another Document
To copy styles from another document, simply
-
Open a blank Word document
-
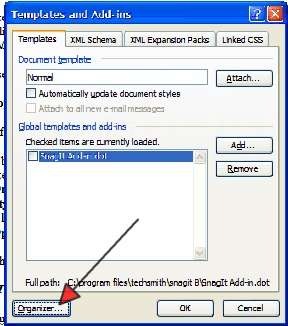
Navigate to Tools -> Templates and Add-Ins
-
Click Organizer
-
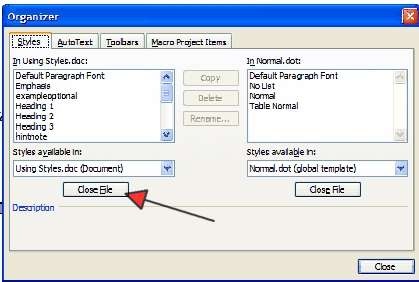
Click Styles tab
-
Click Close File to close the active blank document
-
Click Open File to open a previously created template or the file you want to copy
-
Select the items you want to copy and then click Copy
Note: Once you are finished creating a style, you can create a template by simply going to File Save As and changing the type of document to a .dot (document template) file.
Using the Outline View
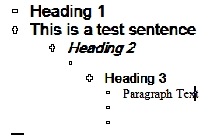
The Outline view gives your document an organized look. It allows you to quickly see the levels of heading and subtext within your document. You can format the heading style and position using the symbols provided by Word.
-
Open the existing document
-
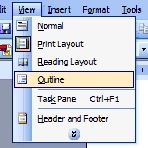
From the View menu, select Outline
-
STEP 2 Formatting Text
A) Outline Edits: When viewing in Outline, the plus and minus signs indicate whether the text has subtext or not. You can drag these symbols around to reposition your text or subtext.
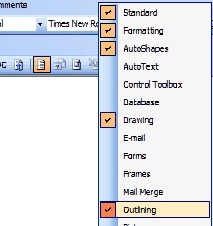
B) Outline Toolbar: Using the Outline Toobar, you can make additional adjustments. To turn on the Format Toolbar, right-click the top toolbar and put a checkmark next to Outlining
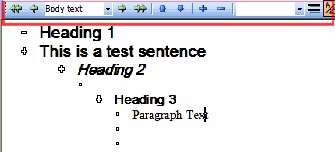
That should bring up a toolbar that looks similar to the one below.
Button Options
The <- and -> buttons moves selected headings and text up and down a “level”
The <-<- changes the selected headings to Heading 1
The –>-> changes the selected headings to paragraph text
The Up Arrow and Down Arrow moves the text up / down a sequential level
The + and – signs expands or collapses the text
Using the drop down arrow, you can select the “level” you want a particular heading to be
Using the dropdown arrow ![]() allows you to select how many ‘levels” you want to view. The
allows you to select how many ‘levels” you want to view. The ![]() icon sets it to only show the first line of a level.
icon sets it to only show the first line of a level.
This ![]() icon is the show/hide formatting
icon is the show/hide formatting
Using the Outline Toolbar with the standard formatting toolbar will allow you to create a variety of styles.
Remember: If you plan to use the same style on different documents, once you have the style set, save it as a template by going to File -> Save As and saving it as a .dot (document template).

