Objective: Learn to produce and edit a podcast.
Recording Audio using Audacity
-
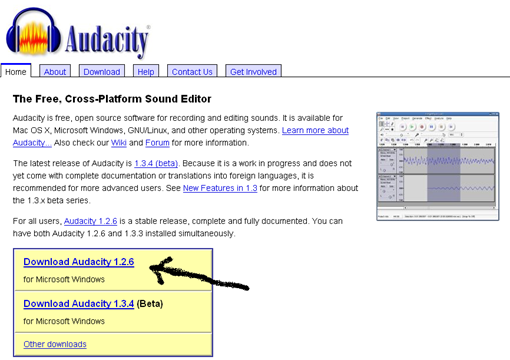
Step 1a. Download the free audio recorder and editor at http://audacity.sourceforge.net/
-
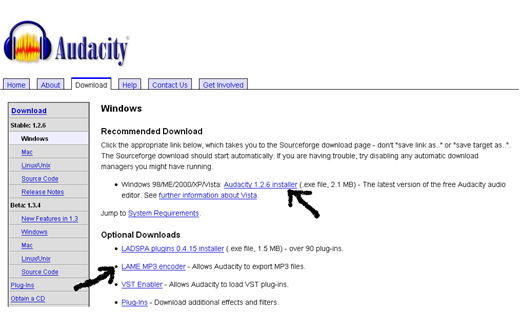
Step1b. Download Audacity X.X.X Installer and also the Lame MP3 Encoder so that you can save your audio into an mp3 file. You can download it at http://audacity.sourceforge.net/download/windows
-
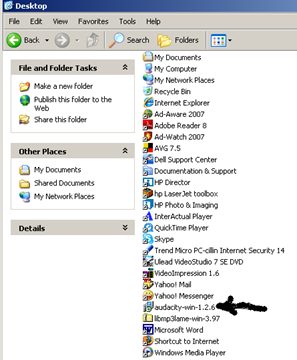
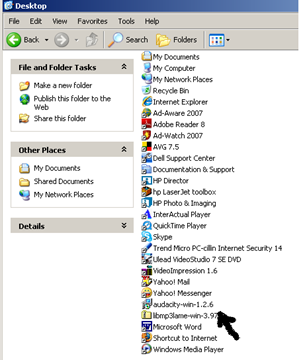
Step 1c. Install Audacity in your computer. The file you downloaded will most likely be in your desktop. Open your desktop and double click on audacity-win-x.x.x
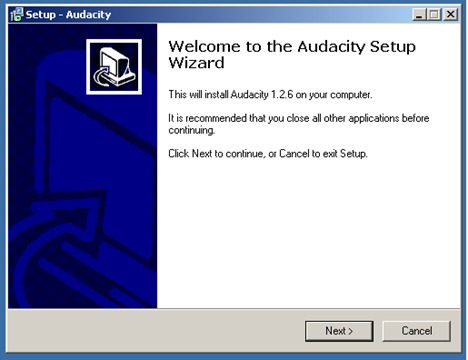
This is an exe file. Install the software into your computer by clicking “Next”.
-
Step 1d. Un-zip Lame MP3 Encoder – it will most likely be in your desktop also.
-
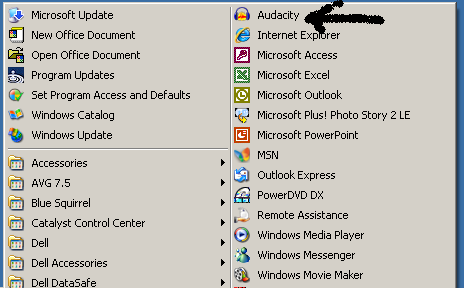
Step 2a. Open the Audacity program. Click on “Start” in your task bar.
-
Step 2b. From the menu, click on Audacity
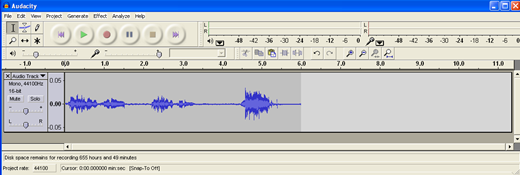
This is how it will look like when audacity is open.
Make sure your microphone is plugged into your computer. You are now ready to record.
-
Step 3. To record audio, click on the red “Record” button and start speaking into your microphone.
As you are recording, your audio will appear in a track like this.
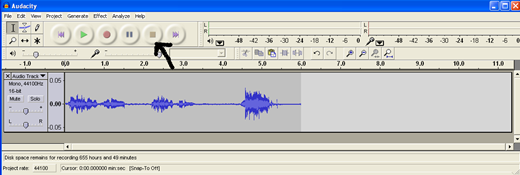
Continue speaking into the microphone until you are done recording your audio. When you are done recording, click on the “Stop” button.
-
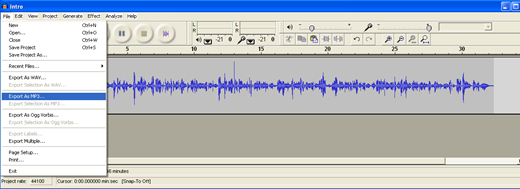
Step 4. You can now save your recording. To save, click on “File” , then click on “Export as MP3”. The first time you use the "Export as MP3" command, Audacity will ask you where lame_enc.dll is saved – it will be in your desktop where you unzipped it.
-
Step 5. Save the audio file in a folder in your hard drive.
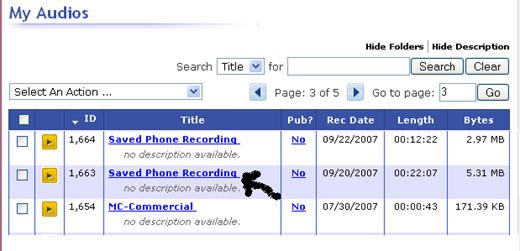
If you decide to include audio interviews in your podcast, you can record phone interviews using Audio Acrobat. Record the interview using your telephone and after you record the call, the audio interview will appear in your Audio Acrobat Account. To access the recording, you will need to log in to the Audio Acrobat Account and click on “Audio” on the navigation menu. It will pull up a list of audios. Select the audio you wish to download – click on the link.
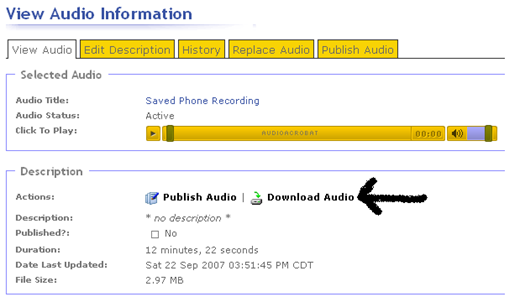
Click “Download Audio”
Save the audio in your hard drive. It will be helpful to rename the file to a file name that identifies the audio.
Edit Audio Using Audacity
-
Step1. Open Audacity program in your computer.
-
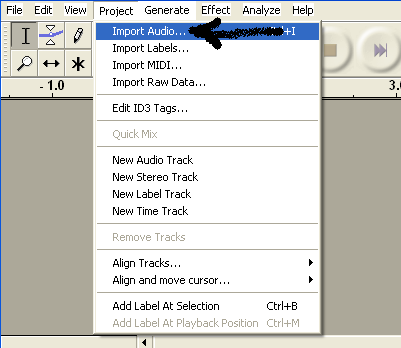
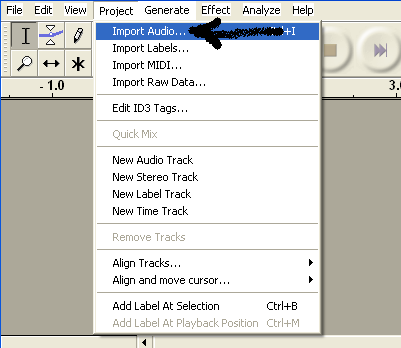
Step 2. To start working on an audio to edit, you need to import your audio file. To do this, click on “Project”, then “Import Audio”
-
Step3. Select audio you wish to edit and double click on it. Audio will be imported into audacity. You can listen to the audio by clicking on the green “Play” button.
-
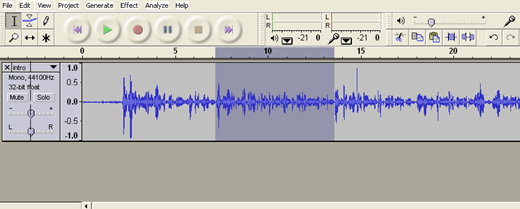
Step4. To edit a portion of the audio, highlight the portion that you want to remove from the audio. First click on the “Selection Tool”
Then, click on the starting point of the audio and drag the tool to the portion of the audio that you wish to edit – that portion will be highlighted.
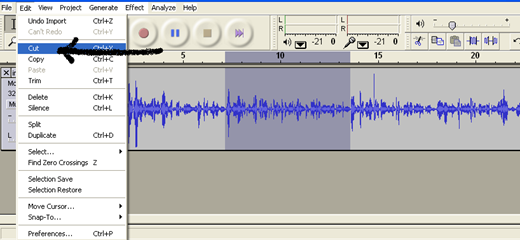
To delete the highlighted portion of the audio, click on “Edit”, then click on “Cut”
-
Step 5. You can continue to highlight and cut portions of the audio until you have your edited version. Once all editing is complete, save your audio by clicking on “File” and “Export as MP3”, then save the audio in your hard drive.
Combining Audio Tracks
-
Step1. Open Audacity program in your computer.
-
Step 2. To start combining audio tracks, you need to import your audio files. To do this, click on “Project”, then “Import Audio”.
-
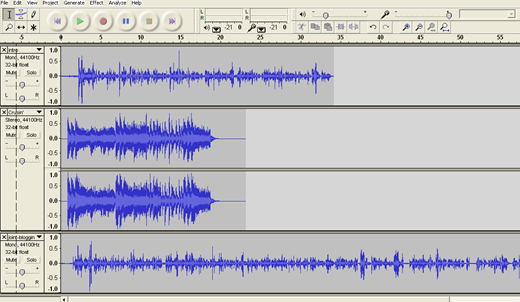
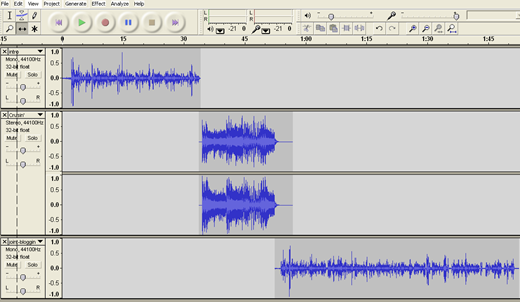
Step3. Select audio you wish to work with and double click on it. Audio will be imported into audacity. Do this step for all the audio tracks that you will be working on. In the example below, we are working with three audio tracks.
-
Step 4. Move the audio tracks so that the audio does not overlap. You will be able to mix audios so after editing it will be just one audio file. To move audio tracks, click on the “Time Shift Tool”
-
Step 5. Click on the audio track you are moving and drag it to the right so that it starts as one audio ends.
-
Step 6. Continue to move the next audio track following the previous step
-
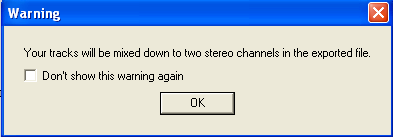
Step 7. Congratulations, you have just produced your podcast. You can now save the audios into one audio file. To save, click on “File” , then click on “Export as MP3”. A warning will pop-up. Click on “OK”.
-
Step 8. Name your new audio file and save it in a folder in your hard drive.
Upload your podcast to your webserver in Cpanel.
-
Step 1. Log into your Cpanel Account.
-
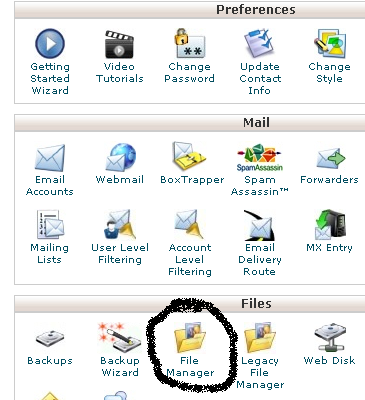
Step 2. Click on “File Manager”
-
Step3. Click on “Upload”
-
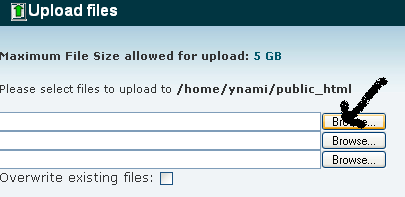
Step 4. Click on “Browse” and find your podcast audio that you would like to upload. And double click the file. Depending on the size of the audio and your Internet connection, it may take a few minutes to upload. Congratulations – you have uploaded your podcast!

