Objective: to setup a new course in Moodle.
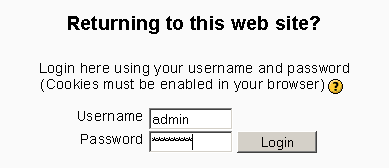
STEP 1: Log in to your Moodle account as administrator
-
Enter your username and password
-
Click login
STEP 2: Add a category
Note: Skip this step if you already have a category for the new course.
-
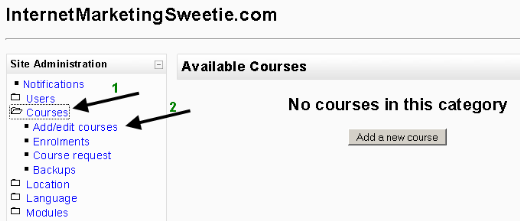
Select Courses -> Add/edit courses
-
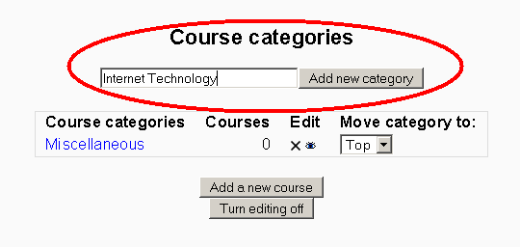
Enter the name of category and click Add new category
STEP 3: Add a new course
-
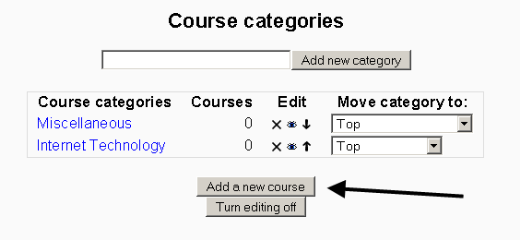
Click Add a new course button.
Note: This button is available in Courses -> Add/edit courses if you skip step 2.
-
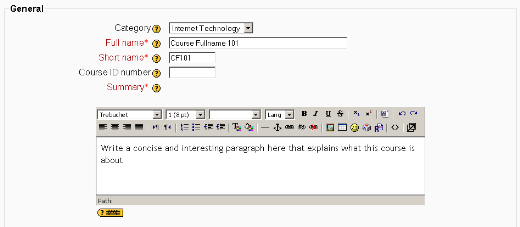
Enter the course setting
- General
-
Category: Choose the category you want to assign this new course to.
-
Full name: The full name of the course.
-
Short name: A short version or code name for the course.
-
Course ID number: the course number (optional).
-
Summary: Enter a concise paragraph explaining about the new course.
-
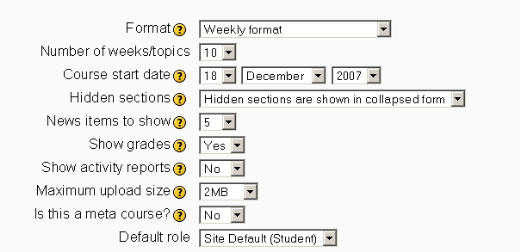
Format:
-
Weekly format: Organized week by week with a clear start and finish date.
-
Topics format: Very similar to weekly format, but each week is called a topic.
-
Social format: Course format is oriented around one main forum.
-
-
Number of weeks/topics: the number of weeks this course will take place.
-
Course start date: Choose a starting date for the course.
-
Hidden sections: Choose the behavior for hidden sections.
-
News items to show: The number of news item to show.
-
Show grades: Hide or show grades to students. This doesn’t prevent teachers to assign grades.
-
Show activity reports: Make activity reports available to students. Teachers always have access to this report.
-
Maximum upload size: The maximum size of individual file that can be uploaded.
-
Is this a meta course: Is this course used as a common area to allow students in specific courses to interact with each other. This can be used to group related courses together.
-
Default role: The default assigned role.
- Enrolments
Enrolment plugins: Choose derault interactive enrolment plugin used in this course.
- Course enrollable: Whether to allow enrollment for this course.
- You can also choose the date range of which this course enrolment is possible.
Enrollment duration: The duration of the enrolment.
- Enrolment expiry notification
-
Notify: Whether to allow enrolment expiry notification.
-
Notify students: Whether to notify students as well.
-
Threshold: Enrolment expiry notification threshold.
- Groups
-
Group mode
-
No groups: no sub groups, everyone is part of one big community
-
Separate groups: each group can only see their own group, others are invisible.
-
Visible groups: each group works in their own group, but can also see other groups.
-
Force: Whether the group mode if forced at a course-level. If set, it ignores individual group settings.
- Availability
-
Availability: Whether this course is available to students.
-
Enrolment key: Only allow access to students which enter this enrolment key.
-
Guest access: Disallow guests, allow guests without key, or allow guests with key.
- Language
-
Force language: Whether to force language settings.
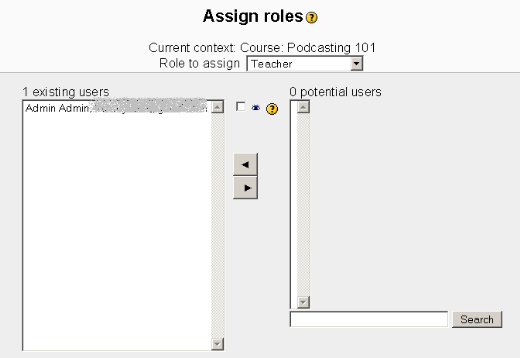
STEP 4: Assign roles
Note: At least assign Teacher role to someone who teaches the course. Students can sign up and enter enrolment key if you allow in previous step.
You can assign different roles to the course:
Administrator: Administrators can usually do anything on the site, in all courses.
Course creator: Course creators can create new courses and teach in them.
Teacher: Teachers can do anything within a course, including changing the activities and grading students.
Non-editing teacher: Non-editing teachers can teach in courses and grade students, but may not alter activities.
Student: Students generally have fewer privileges within a course.
Guest: Guests have minimal privileges and usually cannot enter text anywhere.
STEP 5: Go to the course or logout
Click on the button at the bottom of the page with label “the short name of the course.”
Alternatively, click Logout to logout.

