Objective: to create a welcome email (to override the default/generic sign up email) and a follow-up email series for an Amember product
-
STEP 1: Log in with your username and password
-
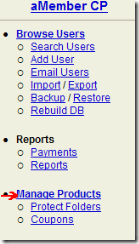
Click “Manage Products” on the left hand menu:
-
STEP 2: Choose Your Product
After you click “Manage Products”, you’ll see “Products/Subscriptions Types List” in the main part of the page.
-
Choose the product you want to work with. Click on the product # link to the left of the product you wish to create the welcome or follow-up series emails for.
-
STEP 3: Create Customized Welcome Email
After you click the product number you will be working with, you’ll see “Edit Product/Subscription” in the main area of the screen with the product details for your product below.
-
Scroll down until you see “Email Settings” at the bottom of the screen.
-
Check the box next to “Use Customized Sign Up Email”
-
Click “Edit Email Template” link
-
STEP 4: Paste or Write Your Welcome Email
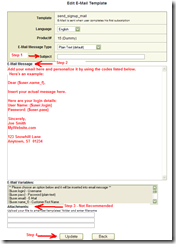
After you click “Edit Email Template” you’ll be taken to the “Edit Welcome Email Screen.”
-
Simply paste in your welcome email. You can use the personalization codes at the bottom. You can copy and paste them or simply left click them to insert them into the email.
Note: We usually include the log in link and login name and password, so members can access their accounts. The exception is when we are sending a promotion to our members that will lead them to another website.
-
Amember does not automatically merge your signature or address in your emails, so you’ll need to enter those in the actual message as well.
-
Once your email is ready, click the “Update” button.
-
STEP 4: Create a Follow-Up Series for Your Product
Once you have created your welcome email, you’ll want to create a follow-up email series for your product. Click the “Back” button after you click the “Update” button on your welcome email.
-
You’ll be taken back to the Product Page. Scroll down until you see the “Email Settings” section again.
-
Enter the number of days you want your message to be delivered. In the box next to “Send Automatic Emails” section enter the number of days AFTER your welcome message you’d like your members/customers to receive the first email in your follow-up series.
-
Click the “Add E-Mail Template” button.
-
Once you click “Add E-Mail Template” you’ll see these changes:
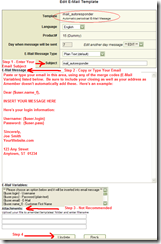
After you click “Edit E-Mail Template” you’ll be taken to the “Edit Email Template” screen. Here you can paste or type your first follow-up email just as you did for your welcome email.
Note: Make sure you are in the autoresponder template by verifying the template area shows “mail_autoresponder.”
-
Enter a subject for your email.
-
Copy or paste the first email in the series. You can use the personalization codes at the bottom. You can copy and paste them or simply left click them to insert them into the email.
-
Click “Update.” Once you have reviewed your email, are satisfied with the contents and are ready to add it to the series, click the “Update” button to save it.
-
STEP 5: Add More Emails to Your Follow-Up Series
1. Click the “Back” button. You’ll be returned to the “Email Settings” screen where you can continue adding more messages by following the steps outlined above.


